
Leave Your Message

7 Tips for Choosing a Westbond Wire Bonder?

Choosing a Westbond Wire Bonder involves more than comparing model numbers and purchase prices. The right machine must match your wire material, package design, production volume, and operator capability. A bonder that performs well on gold wire may require different settings for aluminum or copper applications. Small variables matter. Bond force, ultrasonic power, heating temperature, loop height, and clamp condition can change results quickly. A practical evaluation should include sample bonding, microscopic inspection, and pull or shear testing.

This guide presents seven useful tips for making a more reliable decision. It considers application fit, machine condition, software control, service support, spare parts, training, and long-term operating cost. For refurbished equipment, inspect calibration records and request recent maintenance evidence. For new equipment, confirm installation requirements and technical support response times. A clean exterior is not proof of consistent bonding. That assumption can be costly. Experience also shows that a short demonstration may hide problems that appear during extended production. Ask for repeatability data under realistic conditions. Include your actual lead frame, wire diameter, and package samples when possible. No checklist replaces testing. Still, a structured review reduces avoidable mistakes and helps connect technical specifications with dependable manufacturing performance. Some choices remain uncertain, especially when supplier information is incomplete. That uncertainty deserves attention, not a rushed decision.

7 Tips for Choosing a Westbond Wire Bonder?

Identify Your Wire Bonding Requirements and Production Goals

Choosing a wire bonder should begin with your production goals, not a machine’s feature list. Define the package types, wire materials, wire diameters, and bond layouts you will use. Record target output per hour and acceptable first-pass yield. Small details matter. A 25-micrometer wire needs different control than a thicker power wire. Your plan should also include loop height, bond pitch, and substrate sensitivity.

Tip 1: Build a requirements sheet from real samples. Measure pad size, surface condition, and bond strength targets. Include trial data, even when it looks incomplete. In production, assumptions often become expensive delays.

Tip 2: Separate current needs from future plans. A machine may handle your present package, but limited travel or incompatible tooling can restrict later expansion. Leave room for new materials and tighter pitches.

Reliable selection also depends on process control. Check ultrasonic power stability, bonding force adjustment, temperature control, vision accuracy, and recipe management. Ask how quickly operators can correct an offset or replace a capillary. Downtime hides quietly. Review maintenance access, training quality, spare-part availability, and service response.

Request a demonstration using your actual components. Generic samples can make weak processes look acceptable. I have seen teams focus heavily on speed, then discover unstable bonds during longer production runs. That mistake is avoidable, although not every test reveals fatigue immediately. Collect bond-pull results, visual inspection records, and operator feedback before making a final decision.
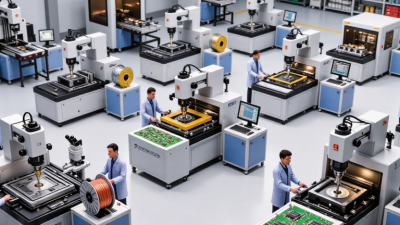
Compare Westbond Bonder Models and Core Technical Specifications

Choosing a wire bonder starts with comparing models against real production needs, not attractive catalog claims. In my experience, wire compatibility reveals more than a long feature list. Check supported wire diameters, bonding force, ultrasonic power, loop-height control, and tool movement. A model handling 15–50 micrometre wire may suit fine-pitch devices, while heavier wire needs stronger clamps and steadier motion. Ask for repeatability data, not only maximum travel. Small errors matter.

Tip 1: Match the machine to your smallest pad pitch and largest wire size. Compare placement accuracy, cycle time, axis resolution, and vision magnification. A fast cycle is useless if alignment drifts after several hours. Review the bonding window for temperature, force, and ultrasonic settings. These details show how easily operators can adjust recipes.

Tip 2: Test the complete process with your substrates.

Tip 3: Check maintenance access. Examine the feeder, capillary holder, work stage, and software interface during a live demonstration. I once focused too heavily on nominal accuracy and underestimated changeover time. That was a costly lesson. Also compare model footprints, power requirements, data logging, and spare-part availability. A slightly slower machine may deliver better stability, easier training, and fewer interrupted runs. Require sample bonds, pull-test results, and clear acceptance criteria before purchase.

Evaluate Bonding Materials, Package Types, and Process Compatibility

Choosing a wire bonder requires more than comparing force, speed, or purchase price. Evaluate the bonding material first. Gold wire supports stable fine-pitch bonding, while copper wire offers lower material cost but demands tighter control of oxidation, heat, and surface cleanliness. Silver alloy wire may suit selected power or high-frequency packages. Material choice changes capillary wear, bond strength, and maintenance intervals. Small differences matter.

Package geometry matters equally. Leadframes, QFN packages, stacked dies, and ceramic packages require different loop profiles, working heights, and clamping methods. SEMI’s World Fab Forecast 2024 tracks more than 1,400 semiconductor facilities and production lines worldwide, reflecting increasingly varied manufacturing needs. Yole Group’s 2024 advanced-packaging analysis also projects strong growth through 2029, especially for chiplet and high-density package designs. These trends favor flexible equipment. Check actual samples, not only brochures. Ask for shear-test data, pull-test results, and repeatability across production lots. Standards such as JEDEC reliability methods can support credible comparisons.

Process compatibility is often underestimated. Confirm ultrasonic frequency, bonding force range, heating control, vision accuracy, software integration, and recipe traceability. A bonder may handle one package well, yet struggle with another after minor tooling changes. That happened in our evaluation. It was not obvious at first. Test the complete process using your wire, substrate, die coating, and production cycle. Leave room for operator skill, because laboratory results can look cleaner than factory results.

7 Tips for Choosing a Wire Bonder

Evaluate bonding materials, package types, wire diameter, bond-pad geometry, loop requirements, thermal limits, and process control before selecting equipment. The chart shows representative wire-diameter windows commonly used for different semiconductor package categories.

Representative engineering ranges: fine-pitch packages generally use thinner wire, while power devices and modules use thicker aluminum or copper wire to carry higher current. The final process window depends on material hardness, pad metallization, pitch, bond force, ultrasonic energy, loop height, and package design.

Assess Equipment Condition, Support Services, and Total Ownership Cost

Choosing a wire bonder requires more than comparing purchase prices. SEMI reported global semiconductor manufacturing equipment sales of 106.3 billion dollars in 2023. That scale reflects intense pressure on uptime, yield, and maintenance control. Inspect the machine under power, not only during a polished demonstration. Check bond pull results, loop consistency, capillary wear, wire clamps, vision alignment, and servo noise. Ask for calibration records and recent failure logs. A clean exterior proves little.

Look beyond price. Deloitte’s 2023 Global Smart Manufacturing Survey found that 86% of manufacturers expect smart manufacturing to become a primary competitiveness driver within five years. That makes technical support and data access important cost factors. Confirm response times, remote diagnostics, operator training, software updates, and spare-parts availability. Request written service rates and realistic repair lead times. Document everything.

Calculate total ownership cost over five years. Include installation, utilities, consumables, preventive maintenance, software fees, training, downtime, and eventual refurbishment. Compare expected output against actual cycle time and first-pass yield. A cheaper bonder may consume more wire and require longer adjustments. My own checklist is not perfect; production conditions can expose weaknesses that factory tests miss. Run sample lots using your materials, package types, and operators. Use a short acceptance trial. That detail often matters more than a glossy specification sheet.

Validate Your Choice Through Testing, Training, and Future Scalability

Choosing a wire bonder requires proof beyond a polished demonstration. WSTS projects global semiconductor sales will reach approximately $687 billion in 2025, increasing pressure on yield, throughput, and serviceability. Your evaluation should reflect that environment.

Request sample bonding on your actual leadframes, wire types, and die surfaces. Measure pull strength, ball shear, loop height, placement accuracy, and first-pass yield. Use thermal cycling and humidity testing aligned with applicable JEDEC methods. Test the ugly cases. A clean demo can mislead.

Training also needs evidence. Ask for operator certification, maintenance practice, recipe control, and troubleshooting records. IPC workforce research continues to identify skilled labor shortages as a major electronics manufacturing concern. A simple interface helps, but guided practice matters more. I have seen capable technicians lose time because undocumented recovery steps were missing. That weakness deserves attention.

Finally, model future demand. WSTS expects continued semiconductor growth, while advanced packaging reports indicate rising investment in finer-pitch and heterogeneous integration. Check whether the machine supports new wire diameters, bonding profiles, software updates, data export, and additional modules. Calculate cycle time at realistic utilization, not showroom speed. Leave room for honest uncertainty. A scalable choice should remain teachable, testable, and maintainable five years from now.