10 Essential Tips for Using an Epoxy Stamping Tool Effectively
In the world of crafting and DIY projects, mastering the use of an Epoxy Stamping Tool can elevate your creations to a professional level. According to industry expert, Dr. Emily Carter, a prominent figure in materials science, she notes, "The right techniques and tools can make all the difference in achieving that flawless, high-gloss finish with epoxy." Understanding how to effectively utilize this powerful tool is essential for both novice and experienced crafters alike.
The Epoxy Stamping Tool offers a unique blend of precision and creativity, allowing users to transfer intricate designs onto various surfaces. However, without proper knowledge and technique, one might not fully harness its potential. This article will provide you with ten essential tips that will empower you to use your Epoxy Stamping Tool effectively, ensuring stunning results every time. From preparation and application to curing and finishing touches, we will cover the crucial aspects that will turn your stamping experience into a seamless endeavor. As you embark on your creative journey, remember that the right approach can transform your visions into reality.
Understanding the Basics of Epoxy Stamping Tools
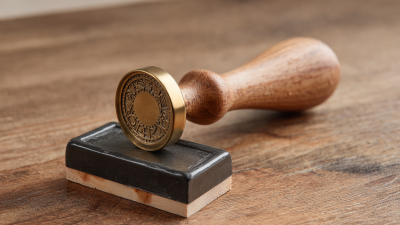
Epoxy stamping tools are essential for any enthusiast looking to create durable and visually appealing designs. At their core, these tools are designed to facilitate the application of epoxy resin in a variety of projects, from crafting jewelry to creating decorative artwork. Understanding how these tools work is crucial for achieving the best results. The primary function of an epoxy stamping tool is to mix and apply resin evenly, allowing for a smooth, bubble-free finish. Familiarizing oneself with the components, such as the applicator and mixing containers, can greatly enhance the effectiveness of the tool.
When using an epoxy stamping tool, it is vital to prepare the workspace and materials beforehand. This includes ensuring that the surface is clean and free of dust, and that all supplies are within reach. Proper mixing of the resin is also crucial; failing to achieve the correct ratio can lead to undesired outcomes. Additionally, understanding different application techniques—such as pouring, spreading, or stamping—can significantly affect the final appearance of the project. By mastering these foundational aspects, users can not only enhance their crafting experience but also boost their creativity with epoxy stamping tools.
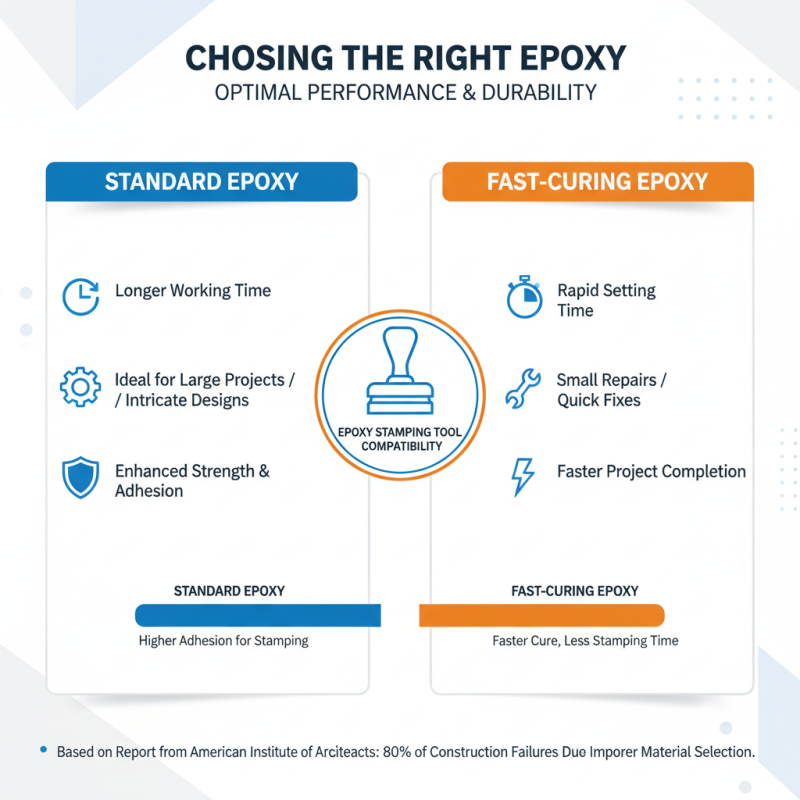
Choosing the Right Epoxy for Your Project
Choosing the right epoxy for your project is critical to ensure optimal performance and durability. According to a report from the American Institute of Architects, approximately 80% of construction failures can be attributed to improper material selection. When it comes to epoxy materials, selecting the appropriate type can significantly impact the adhesion and longevity of the final result, particularly when using an epoxy stamping tool. The two main types of epoxy are standard epoxy and fast-curing epoxy, each offering distinct advantages depending on the project’s requirements.
For projects that demand high strength, resistance to chemicals, and moisture, a standard epoxy formulated for such conditions is crucial. A study by the Epoxy Resin Committee indicated that using high-quality resins and hardeners enhances the bonding capabilities, with bond strengths reaching up to 3,600 psi in ideal conditions. On the other hand, fast-curing epoxy is advantageous for those who require a quick turnaround; however, it may offer slightly less durability. It's essential to assess the specific environmental factors and load-bearing needs of your project to make an informed choice. Opting for the right epoxy based on these considerations can elevate the quality and longevity of the finished application, making it a foundational step in the successful use of an epoxy stamping tool.
Preparing the Surface for Optimal Adhesion
Preparing the surface for optimal adhesion is crucial when using an epoxy stamping tool. Proper surface preparation not only enhances the bond strength between the epoxy and the substrate but also prolongs the lifespan of the application. According to a report by the Adhesive and Sealant Council (ASC), improperly prepared surfaces can lead to a bond failure rate of up to 30% in adhesive applications. This statistic highlights the importance of dedicated surface cleaning and priming, as contaminants like dust, grease, or oil can significantly hinder adhesion properties.
To ensure optimal adhesion, start with thorough cleaning. Mechanical cleaning methods such as sanding or grinding can effectively remove any top layers of the substrate that may trap debris or moisture. Additionally, using a solvent-based cleaner can eliminate oils and residues that might be present. A study from the American Concrete Institute emphasizes that roughening the surface increases the surface area for adhesion, which can improve bond strength by as much as 40%. Following these steps, applying a suitable primer can further enhance the adhesion of the epoxy to the surface, particularly on non-porous substrates. By focusing on these preparation techniques, users can maximize the effectiveness of their epoxy stamping tools and achieve superior results.
Surface Preparation Techniques for Epoxy Stamping Tools
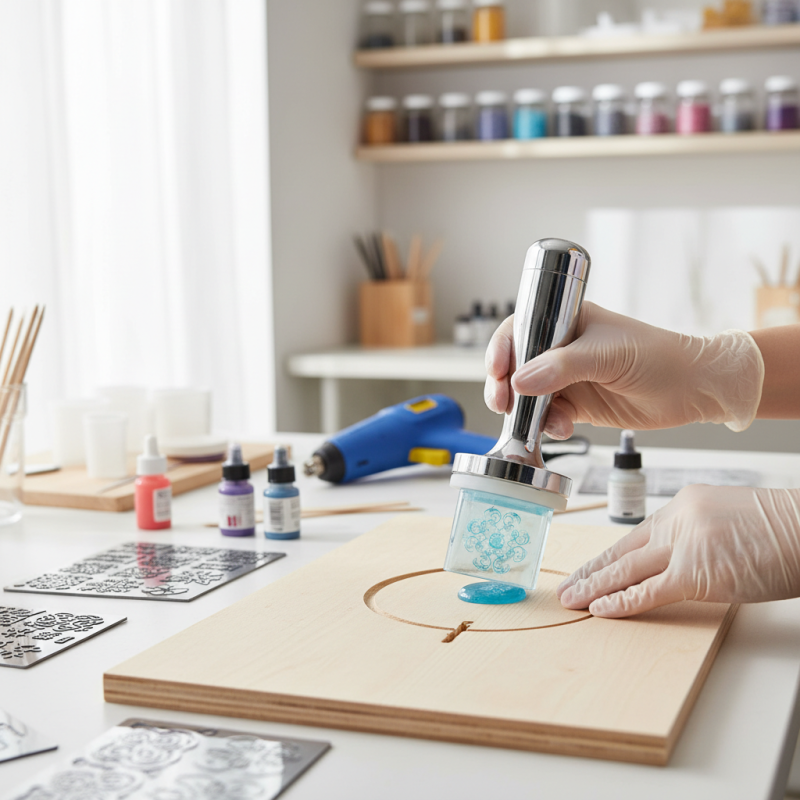
Step-by-Step Guide to Using an Epoxy Stamping Tool
Using an epoxy stamping tool effectively requires understanding the nuances of the stamping process. The first step involves selecting the right type of epoxy for your project. Industry reports from the Adhesives and Sealants Industry show that there is a growing demand for high-performance epoxies, expected to reach a market value of over $6 billion by 2025 due to their versatility in applications such as art, crafts, and manufacturing. Prepare your workspace by ensuring it is clean and well-ventilated, as this will help prevent any contaminants from interfering with the cure and finish of the epoxy.
Once you’ve chosen your epoxy, the next critical step is to mix it according to the manufacturer’s guidelines, as improper ratios can lead to issues such as uneven curing or diminished strength. According to research by the American Chemical Society, accurately measuring and mixing components can increase the structural integrity of the final product by up to 40%. When stamping, apply even pressure and take care to maintain a steady hand; erratic movements can result in undesirable patterns or bubbles, which are common pitfalls for both novice and experienced users. By mastering these steps, users can greatly enhance their stamping techniques and achieve professional-quality results.
Common Mistakes to Avoid When Using Epoxy Stamping Tools
When using an epoxy stamping tool, avoiding common mistakes can significantly enhance your results. One frequent pitfall is inadequate surface preparation. A clean and properly prepped surface is essential for ensuring that the epoxy adheres well. This means removing all dust, oils, and debris that could create barriers between the epoxy and the substrate. Additionally, failing to balance the mixing ratio of resin and hardener can lead to issues such as improper curing or an unsatisfactory finish.
Another common mistake is rushing the stamping process. Many users underestimate the importance of giving the epoxy sufficient time to set before applying the stamping tool. This impatience can result in distorted patterns or incomplete impressions. Moreover, not using enough pressure while stamping can lead to shallow impressions, making the final design less defined. Lastly, it's imperative to follow the manufacturer's instructions regarding curing times and environmental conditions, as deviations can compromise the quality of the work. By being mindful of these pitfalls, you can significantly improve your epoxy stamping projects.